Expert Tips to Stop Drafts & Protect Your Home
Old wooden windows add timeless charm to your home, but they can also be a source of drafts, moisture, and higher energy bills. Sealing them properly preserves their beauty, keeps your home comfortable, and prevents long-term damage. This guide shows you everything you need to know about sealing old wooden windows-step by step.
Why Sealing Old Wooden Windows Is Essential
Even small gaps in wooden windows can lead to big problems:
- Energy loss: Air leaks make heating and cooling less efficient.
- Moisture damage: Water seeping in can rot the wood over time.
- Pest entry: Tiny gaps let insects inside.
- Noise intrusion: Drafty windows let in more outside sound.
Sealing your windows isn’t just maintenance,it’s an investment in comfort, efficiency, and longevity.
How to Inspect Old Wooden Windows Before Sealing
A careful inspection ensures you target the right areas. Check for:
- Cracks and gaps: Look around frames, sashes, and corners.
- Soft spots or rot: Press gently to detect weakened wood.
- Damaged glazing putty: Cracks around glass can let in air and water.
- Worn weatherstripping: Old or brittle strips need replacing.
- Paint condition: Flaking paint may indicate moisture issues that need attention.
Pro tip: Mark all areas that need sealing or repair before starting so you don’t miss anything.

Materials You’ll Need for Sealing Wooden Windows
Using the right materials makes all the difference:
- Caulk: Exterior-grade, paintable silicone or acrylic-latex caulk works best for sealing gaps around frames.
- Weatherstripping: Foam, rubber, or felt strips provide a tight seal for movable sashes.
- Glazing putty: For cracks or missing putty around glass panes.
- Wood filler: Small cracks or chips in frames can be filled before sealing.
- Tools: Caulking gun, putty knife, utility knife, sandpaper, and damp cloth for smoothing caulk.
Tip: Avoid standard indoor silicone caulk for painted wood, it may not hold paint well.
Step-by-Step Guide to Sealing Old Wooden Windows
Follow these steps for a durable, professional-looking seal:
Step 1: Clean the Windows
Remove dirt, dust, loose paint, and old caulk. Use a damp cloth or mild cleaner. Clean wood ensures caulk and putty stick properly.
Step 2: Repair Damaged Wood
Fill small cracks or chips with wood filler. Sand smooth once dry. Replace any rotted sections before sealing.
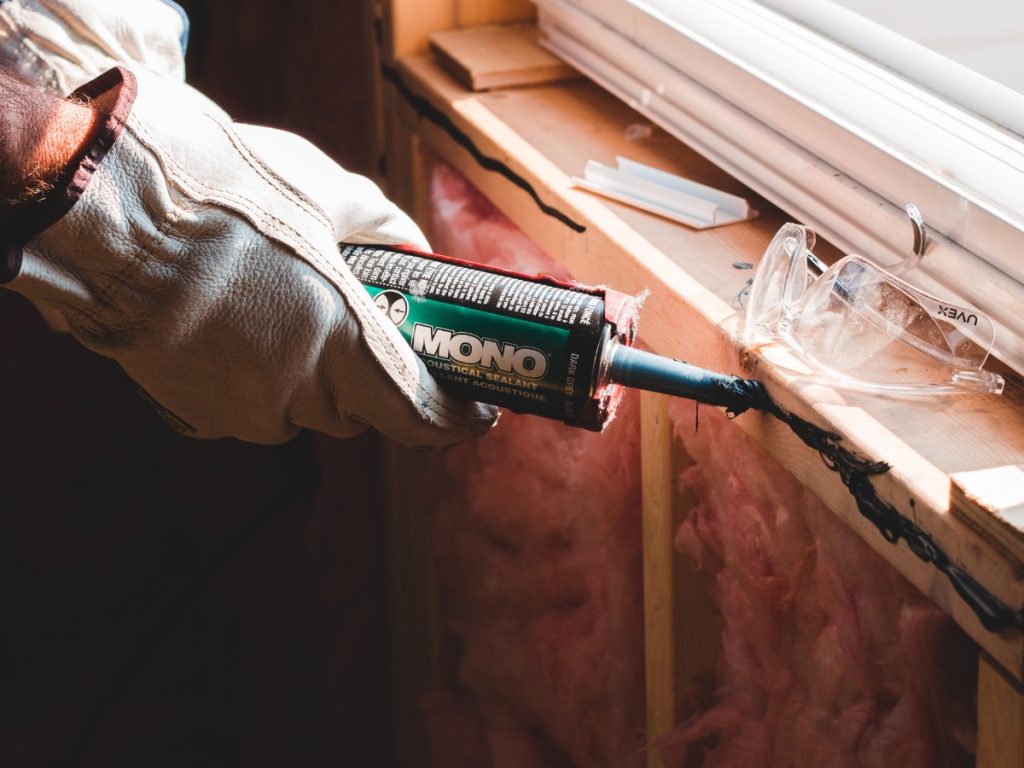
Step 3: Apply Caulk
- Run a bead of exterior-grade caulk along gaps between the window frame and the wall.
- Smooth with a damp finger or caulking tool for a neat finish.
- Focus on corners and edges where drafts are most likely.
Step 4: Install or Replace Weatherstripping
- Choose the right type for your window: foam, rubber, or felt.
- Ensure a snug fit without preventing the sash from sliding smoothly.
- Replace worn strips for long-lasting efficiency.
Step 5: Re-Glaze Window Panes if Needed
- Remove old, cracked putty with a putty knife.
- Apply fresh glazing compound around glass edges.
- Smooth and let cure according to instructions.
Step 6: Paint or Stain
After caulk and putty cure, paint or stain frames. This protects wood and caulk from UV damage and moisture.

Maintenance Tips for Long-Lasting Seals
- Inspect seals annually for cracks, gaps, or worn weatherstripping.
- Clean frames and tracks to prevent debris from damaging seals.
- Repaint or restain wooden frames every few years to protect the wood.
- Avoid overstuffing gaps with too much caulk, it can make windows hard to operate.
When to Hire a Professional
DIY sealing works for minor gaps and repairs. Call a professional if:
- Your windows have extensive rot or damage
- Multiple windows need attention
- You own historic or delicate wooden windows
- Drafts persist after DIY efforts
Professional sealing ensures a precise, durable result and preserves your windows’ value.
Common Mistakes to Avoid
- Skipping inspection: Sealing over rot or structural issues won’t fix the problem.
- Using the wrong caulk: Non-paintable silicone can peel or crack.
- Ignoring glazing cracks: Air and moisture can still leak around glass.
- Over-tight weatherstripping: Can make opening/closing difficult.
Avoiding these ensures your sealing job lasts longer and performs better.

Benefits You’ll Notice After Sealing
- A draft-free, comfortable home
- Lower heating and cooling costs
- Reduced noise from outside
- Protection from moisture, rot, and pests
- Longer-lasting, beautiful wooden windows
Sealing is a small effort that delivers long-term savings and comfort.
FAQs – Sealing Old Wooden Windows
Q: Can I seal old wooden windows myself?
A: Yes, for minor gaps and cracks. Extensive rot or multiple windows may require a professional.
Q: How often should I reseal windows?
A: Inspect every year; reseal every 5-10 years depending on wear.
Q: What type of caulk is best?
A: Exterior-grade, paintable silicone or acrylic-latex caulk. It sticks well and allows painting.
Q: Will sealing make windows harder to open?
A: Properly applied caulk and weatherstripping shouldn’t affect operation.
Q: Can sealing old windows save money?
A: Yes, sealing reduces drafts, lowers energy bills, and protects your home from damage.